Building a workflow
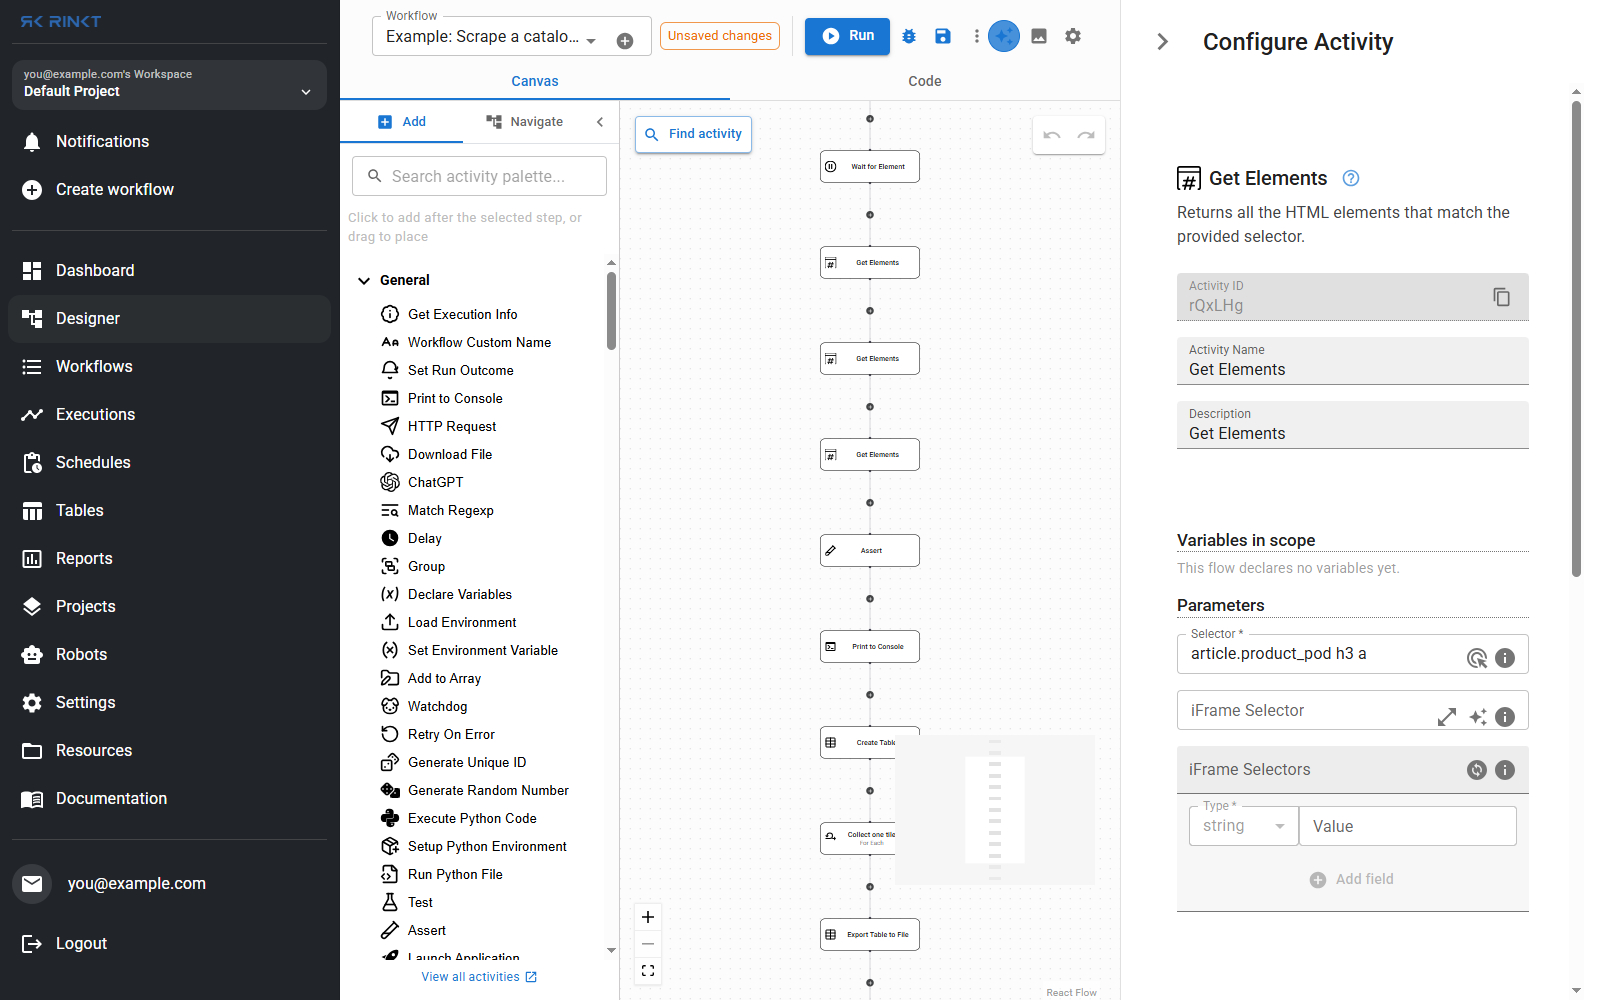
Three regions, left to right: the palette, the canvas, and — once you open a step — the configure panel.
The palette
Activities, grouped the way the reference groups them. Search by name, or use Find activity above the canvas when you know roughly what you want and not what it is called.
A palette click adds after the currently selected step. Dragging places the activity where you drop it. Nothing is inserted at the top of the canvas by accident: if no step is selected, the new one goes at the end.
The canvas
One node per step, top to bottom, in the order they run. Control flow nests: a For Each
node carries its own branch, and the badge on it shows how much is inside.
The toolbar at the top of the canvas holds undo, redo, zoom and fit. The minimap sits bottom right.
The configure panel
Double-click a node. A single click only selects it — which is what the palette needs, and why the two gestures differ.
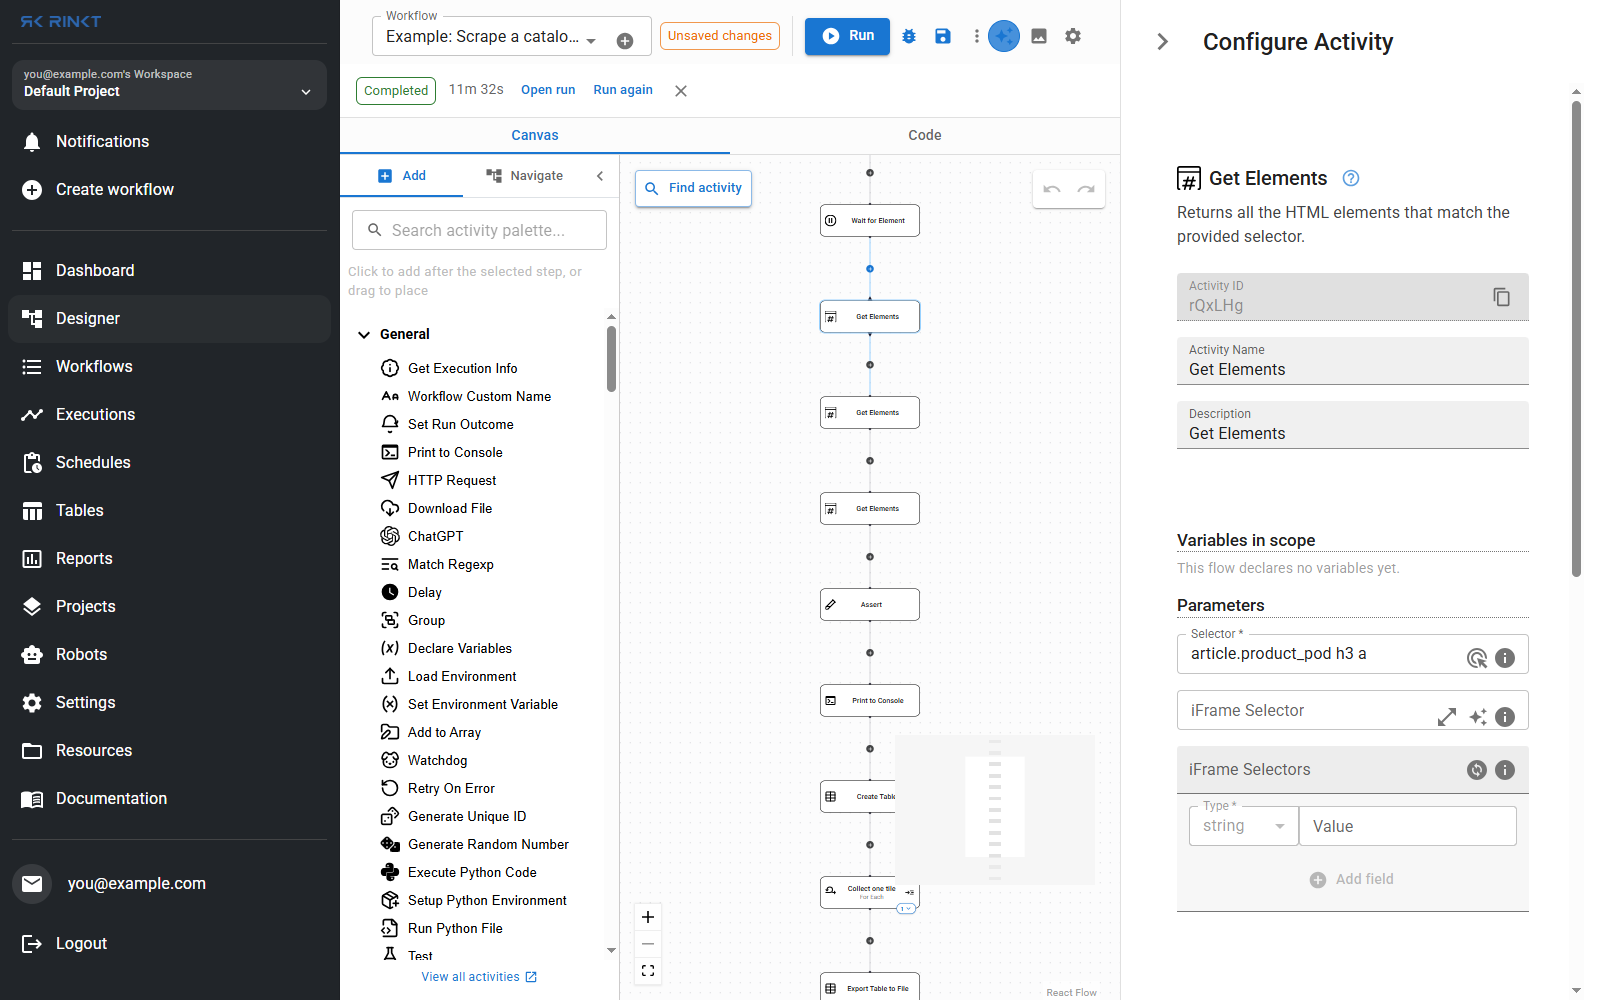
- Activity ID — the short id (
rQxLHgabove) that logs, errors and the MCP tools use to name this step. Copy it when you want to ask about one step in a long run. - Activity Name and Description — free text. Set them when the step's purpose is not obvious from its type and inputs, above all on clicks and inputs against a raw selector, where the selector hides the intent. They are not cosmetic: when a step fails, its description and its neighbours' are what the platform reads to diagnose the failure.
- Variables in scope — what this step can refer to at this point in the flow.
- Parameters — the activity's inputs, required ones marked. Each has its own description in the activity reference.
The Code tab
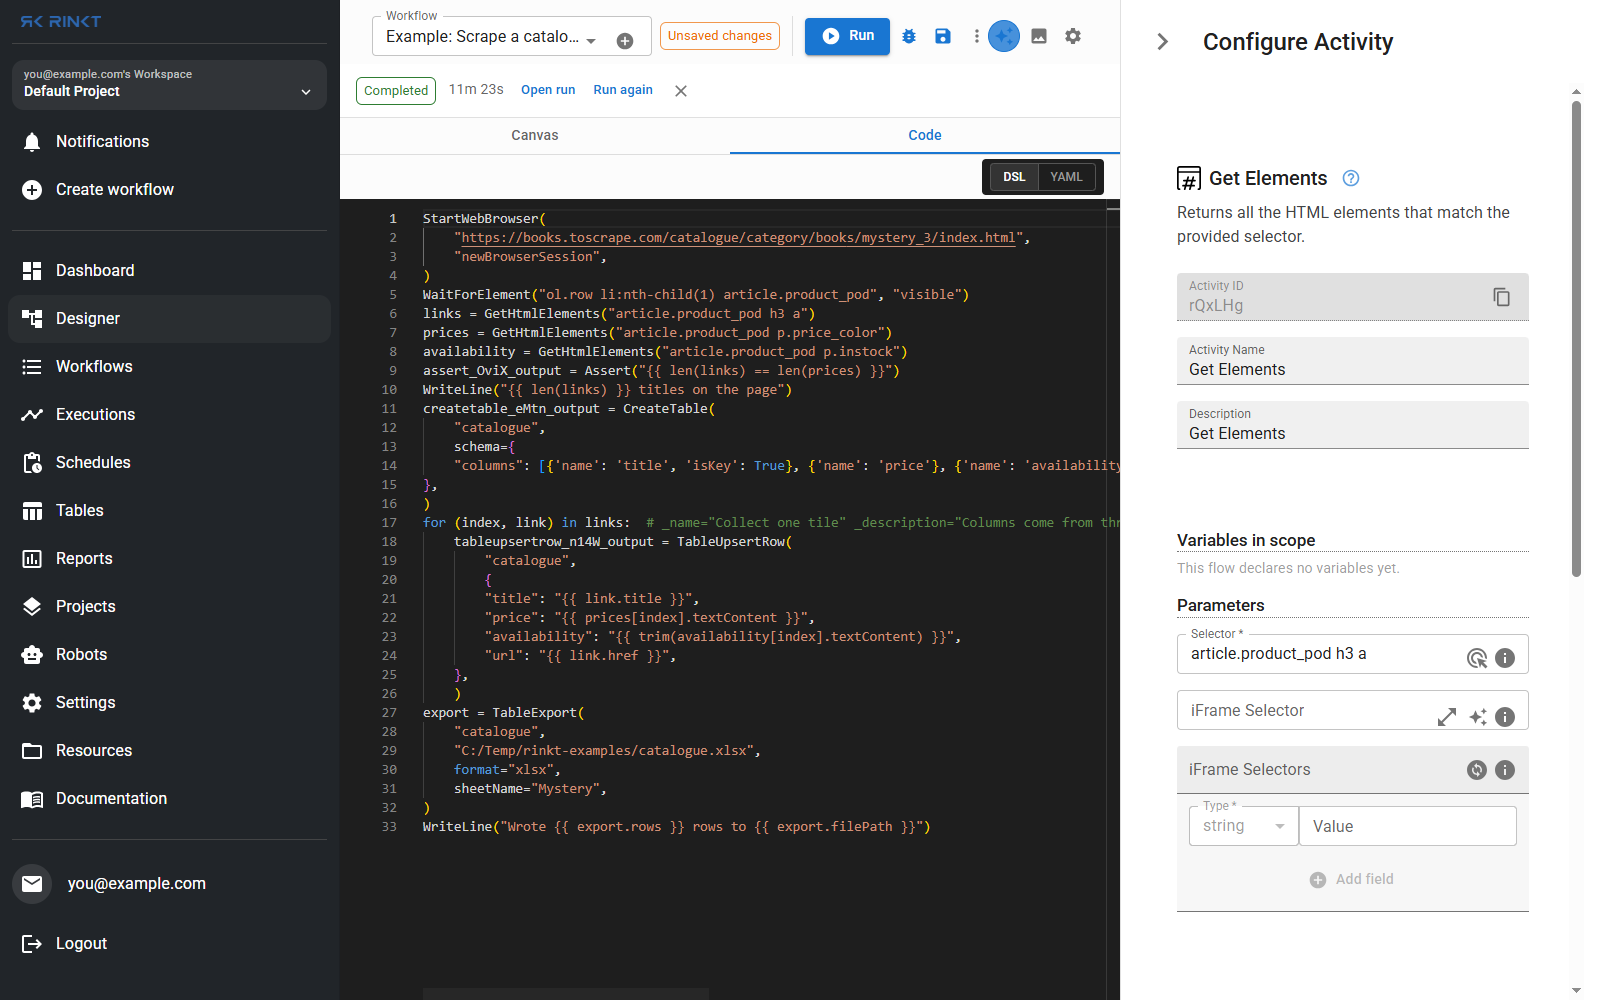
The same workflow as text, one line per step, in the order they run. The toggle on the right switches between DSL — the Python-shaped language described in Writing workflows — and the YAML the platform stores.
name = Step(...) keeps a step's result to use further down, as {{ name }}. Right-click
a line for what you can do with that activity: toggle a breakpoint (F9), debug from there,
or configure it. Clicking the gutter toggles a breakpoint too.
Editing here is editing the workflow. The two tabs are two views of one thing.
Saving
Save commits, and until you press it the header shows Unsaved changes — including after a nudge that only moved a node. Every save snapshots the previous state, so a change can be rolled back later, after previewing the diff between the two versions.