Building your first workflow
To build a workflow, you simply drag and drop the required activities from the Automate Studio toolbox, or record all, or part, of the workflow.
Building a stock price notifier#
To check the value of a certain stock market index and send an email, the manual steps might be:
- Open the browser and navigate to google.
- Type for instance 'FTSE 100' followed by an enter key.
- Send an email with the value.
Let's translate these steps into a workflow.
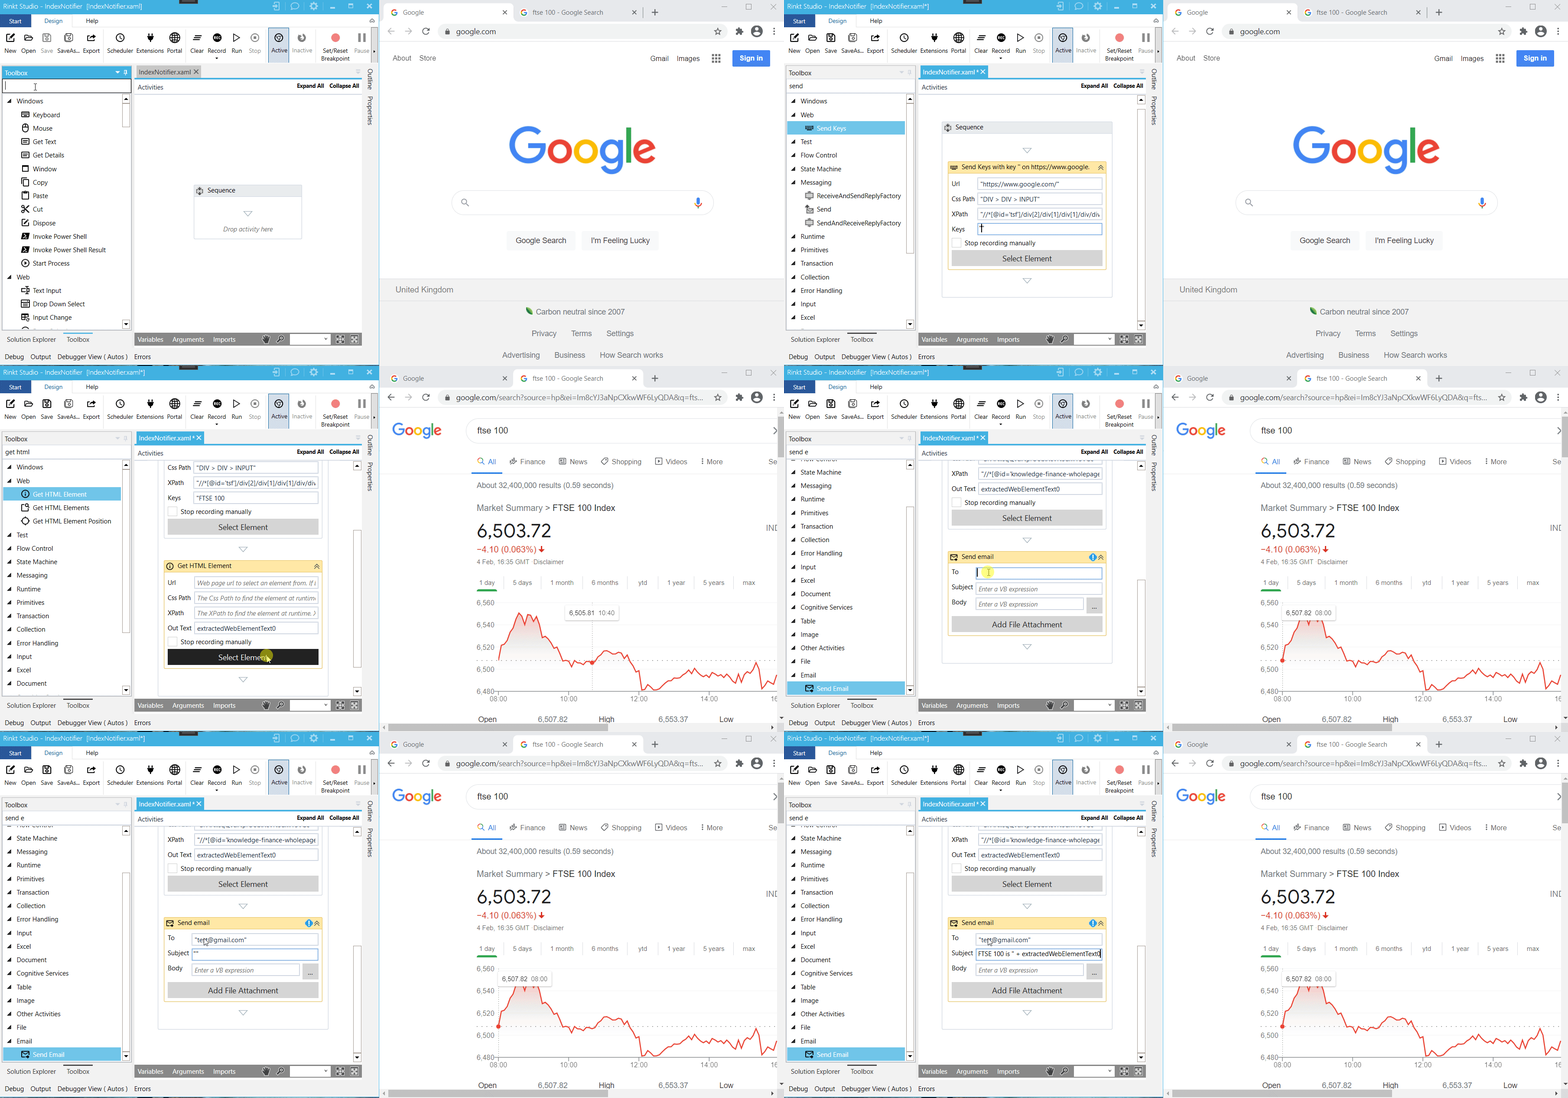
- Drag Send keys from the toolbox. Type Send k and drag Send keys.
- Press Select Element on the dropped activity to select the field in Google to be used when typing the text.
- Enter the text you want the workflow to type followed by the enter key in the Keys expression box under "". We must use "" because the entered text is an expression that can be composed using other variables, or we could call some functions on it. The system will simulate all the input text including enter(new line).
- Drop Get HTML Element from the toolbox.
- Select the element in the browser page that has the price.
- Drop Send Email from the toolbox.
- Set the To, Subject and Body. As described above, we need to use "" to specify the text. The body can be set directly in the body expression box, or we can use the ... to open the Body editor. For Body we can use an expression like: "The value of the stock index is: " + extractedWebElementText. extractedWebElementText is the variable generated by the Get HTML element, and it represents the inner text of the html element.
One question that might arise, might be why would I need do this when I could just check it manually. For this particular case, the advantage of using a Robot is that you can use parameters and search for different stocks, shares, funds, indicies, etc, or you can even schedule the workflow to run at specific times and send an email only if the value is over a threshold.

You now have built your first workflow, and your personal Robot is ready to execute your commands.