Document Platform
The document platform allows Rinkt to transform unstructured data from documents like PDF, jpg, png or tiff into useful data that can be processed further(added to an ERP, send it over email or just analyse it) The platform can be accessed from https://document.rinkt.com/dashboard with the same username and password used for Robot or Portal.
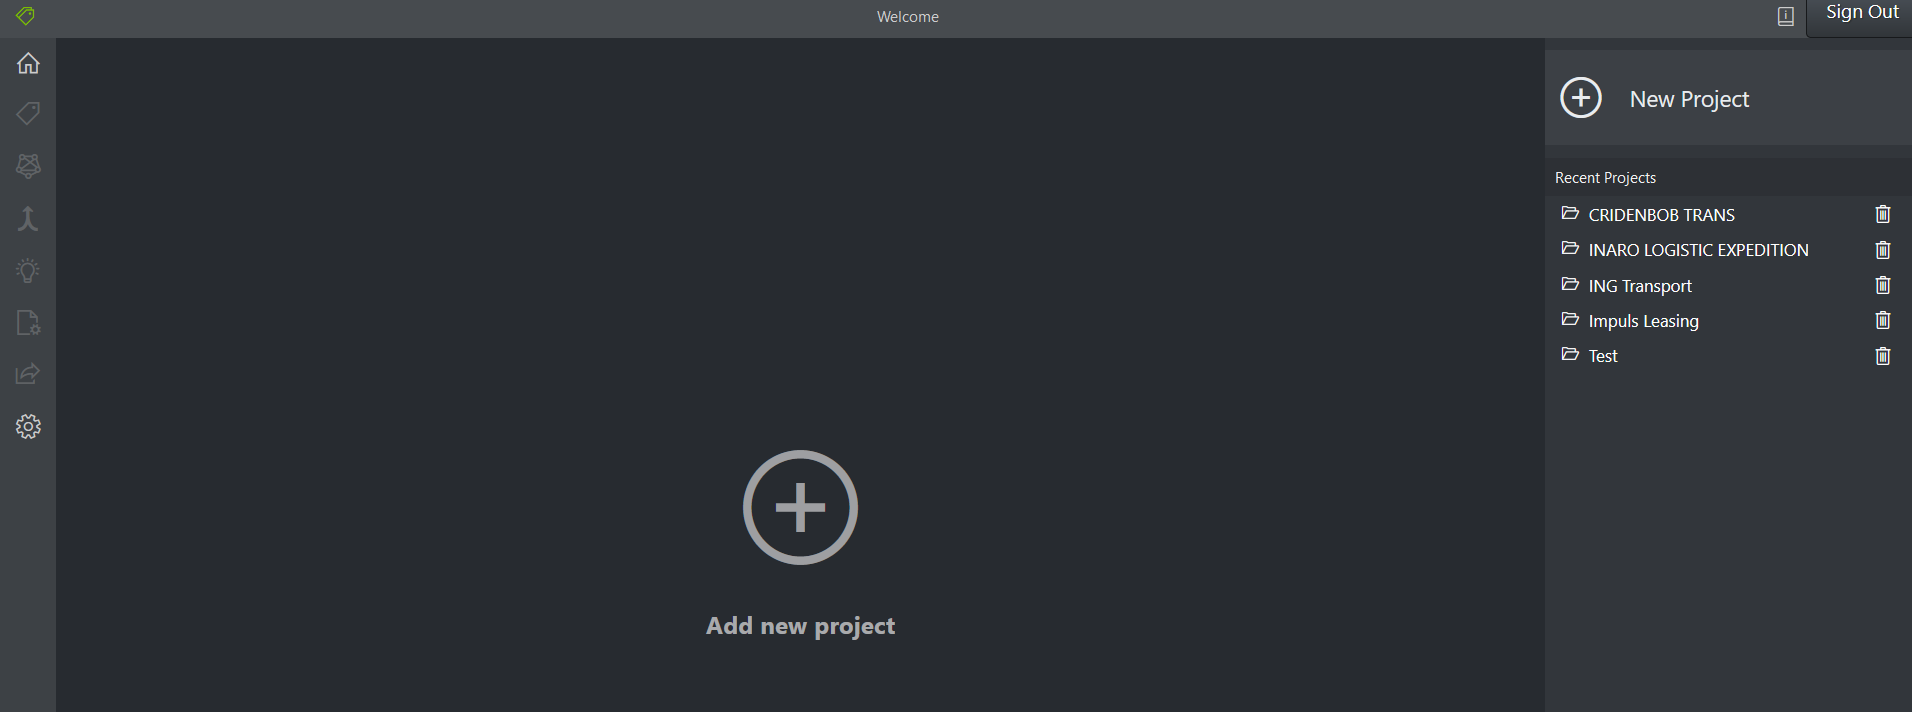
Every new document template(invoice, receipt, confirmation letter, etc) on the platform is organized as a project(right side of the screen, see above). Documents with a similar layout can be grouped under the same project.
To create a new project, you can either click on the middle button Add new project, or the right top button New Project, and you need to specify a unique name and an optional description. Once a project is created, you need at least 5 different documents(pdf, jpeg, png or tiff file) to train a model. It is better to add more files if the confidence level is low. The process of training involves defining the tags that we want to extract from a document and mapping the text from the document(middle of the screen) to the corresponding tags(right of the screen).
Tag Editor#

To add new files to the project, you can use the + button. Multiple files can be loaded at the same time.

Once a file is loaded, we need to start adding the tags. The tags can added using the top right toolbar Tags

As mentioned above, we can have simple tags like Vat, Invoice Number or Table tags, if we want extract data from tables.
To add a new tag, press + button and specify a name.
To add a table tag press the following button

and select the type of the table.
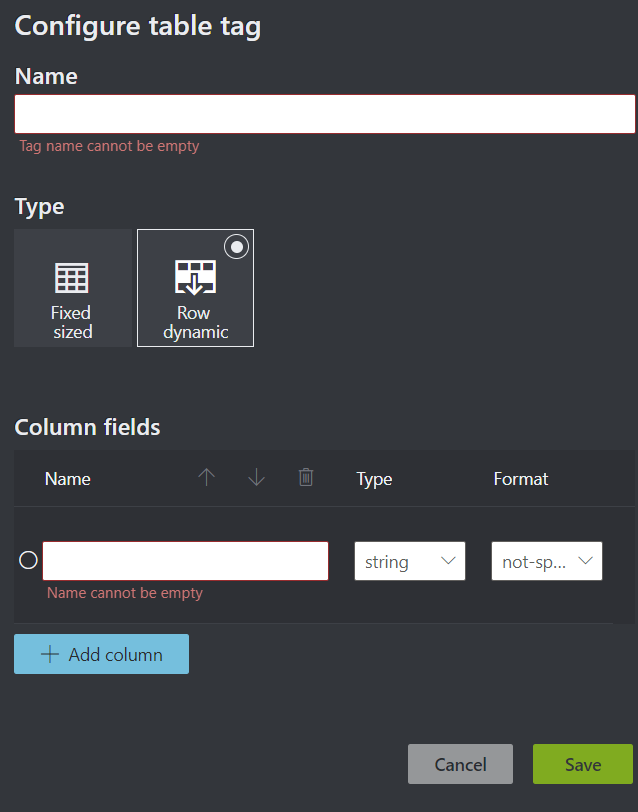
Unless you want to load only specific rows from a table, you can select Row dynamic and start adding the name of the columns to be extracted from the table.
The process of mapping a field is done by clicking on the corresponding field in document area and then clicking on the tag/column tag(right side, tags section).
Sometimes, the ocr may no detect the space between two words or maybe we want to select only part of the word. For this specific issue, we can click the draw region button from the toolbar and then start drawing on the document the region to be extracted. To exit the drawing mode, just press draw region button again.
A set of useful keyboard shortcuts can be found by pressing I button, top right, near Sign out
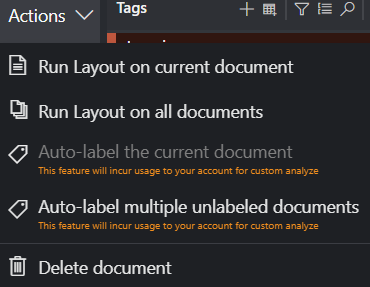
A set o actions can be performed on the loaded document like:
Auto-label the current document#
Apply labels automatically to the current document instead of mapping them manually. This works only after training at least once the project
Auto-label multiple unhandled documents#
Apply labels automatically to the new added documents instead of mapping them manually. This works only after training at least once the project
Delete document#
Deletes the current document.
Once all the labels are mapped we can move to Training.
Train#
To start the training, just press the train button displayed below.

The process of training should take around 1 minute, but it may take longer for larger projects(over 10 files and over 15 tags).
When training a project, the name of the model it is advisable to reflect the project to make the compose(see below) process easier.

If the Accuracy value is too low(< 60%), it is advisable to revisit that tag and maybe add more documents.
Compose#
If we want to have multiple documents treated as one, we can compose multiple projects(their models) into 1.

For composition, we need to create a separate project which will have just the compose section(Labels and train can be ignored).
To add projects to a "compose" project, just check the projects as in the screenshot below.
The filter in the top corner can be used to narrow down the projects that we want to add. That is why is advisable to add a "Group Name"("rent" for instance) when setting the name of the model at Train time.

Once we are happy with the selection we can press the compose button(see screenshot above), and the process should take around 1 minute.
Analyze#
To test our train model, we can use any other document than the one attached to the project.

When analyzing a file, by default we use the latest trained model, but that can be changed using the Change button.
The "analyze" will display the accuracy for each tag, and the extracted values.
Project Settings#
The name and the description of the project can be changed using this screen.

Utilities#
In this section we can share a project or import the tags from an existing project.

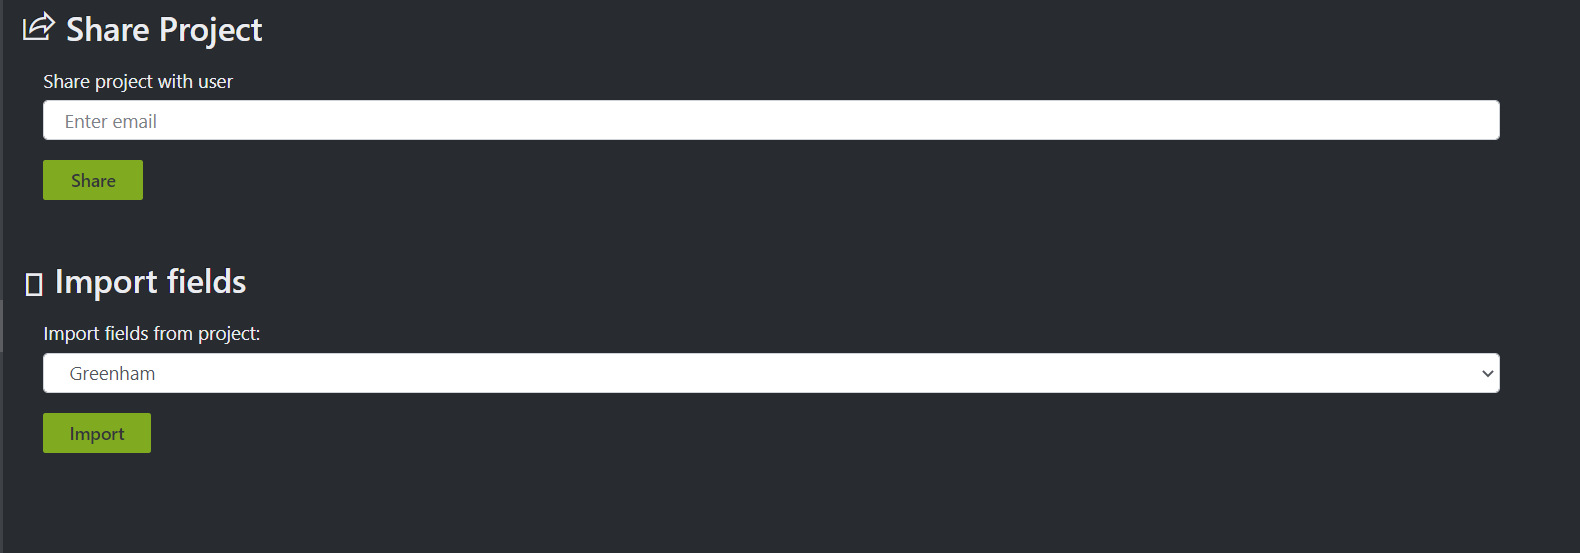
Share project#
Shares the current project with any existing user. The shared project will exist for all users and any changes made by someone to the project will be reflected to anyone sharing this project.
Import Fields#
Instead of redefining the tags for each project, we can define the necessary tags for a project and then import that tags in all other projects.
Settings#
In this section, you can impersonate a user account if you are the admin for that user, or you can copy a project from one user to another.

Impersonate user#
If you want to check the projects of a user for which you are the administrator, you can use this section to impersonate that user. The administrator can add a user to its group using the portal Users tab.
Copy project#
Instead of sharing a project, you may want to copy an existing to another user.