Rinkt Portal
The Rinkt Portal puts you in total control of all automation robots and project workflows.
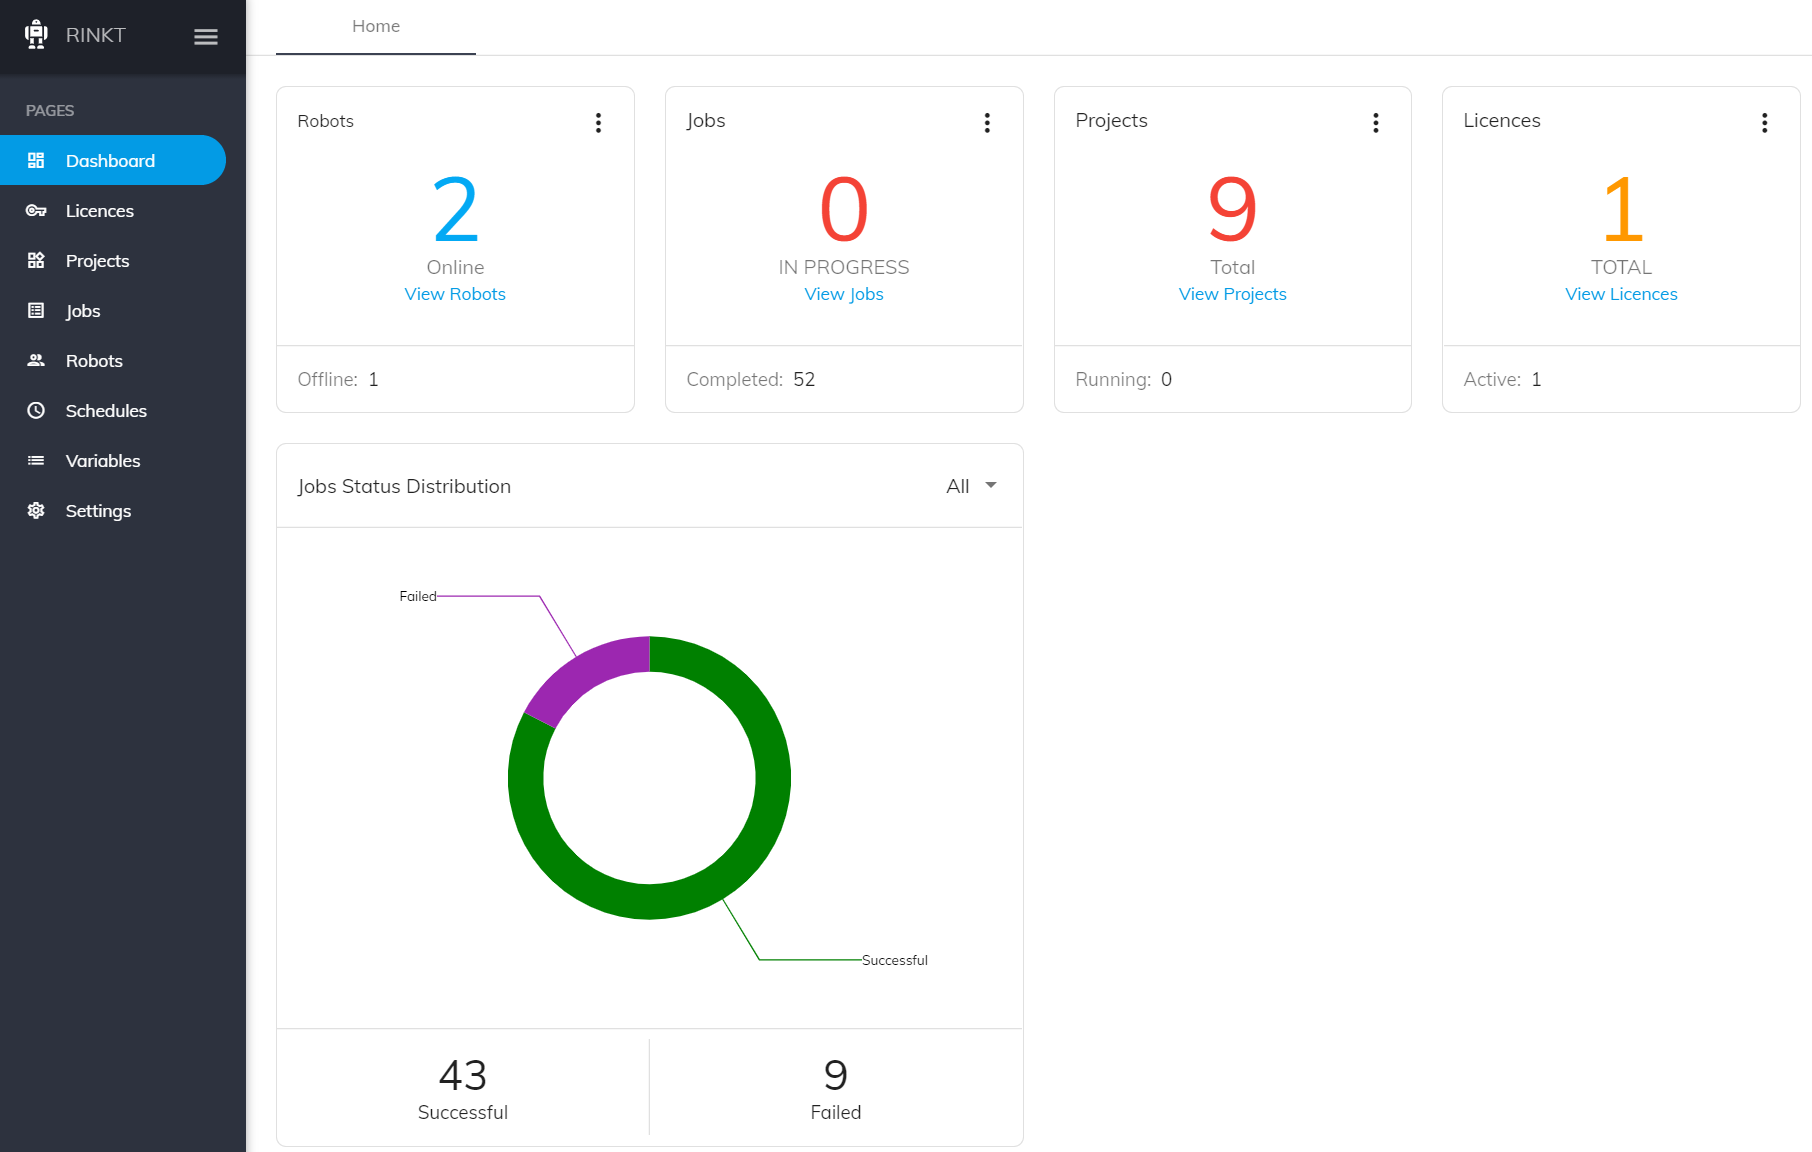
Dashboard#
The dashboard displays a complete summary of the Robots, Jobs, Projects, Licenses and Jobs Distribution.
Projects#
All the projects which have been uploaded to the Rinkt DB.
A project is a collection of workflows, together with a startup workflow. For instance, in the Studio stock price notifier example, we could have a project with two workflows, with one being the main workflow that iterates through the list of stock indices for which we want to get the price of a particular stock while the other workflow, the child workflow, would be the workflow that actually extracts the price from Google.
Rinkt Studio can have multiple projects saved locally, but only those projects that have been published are available here.
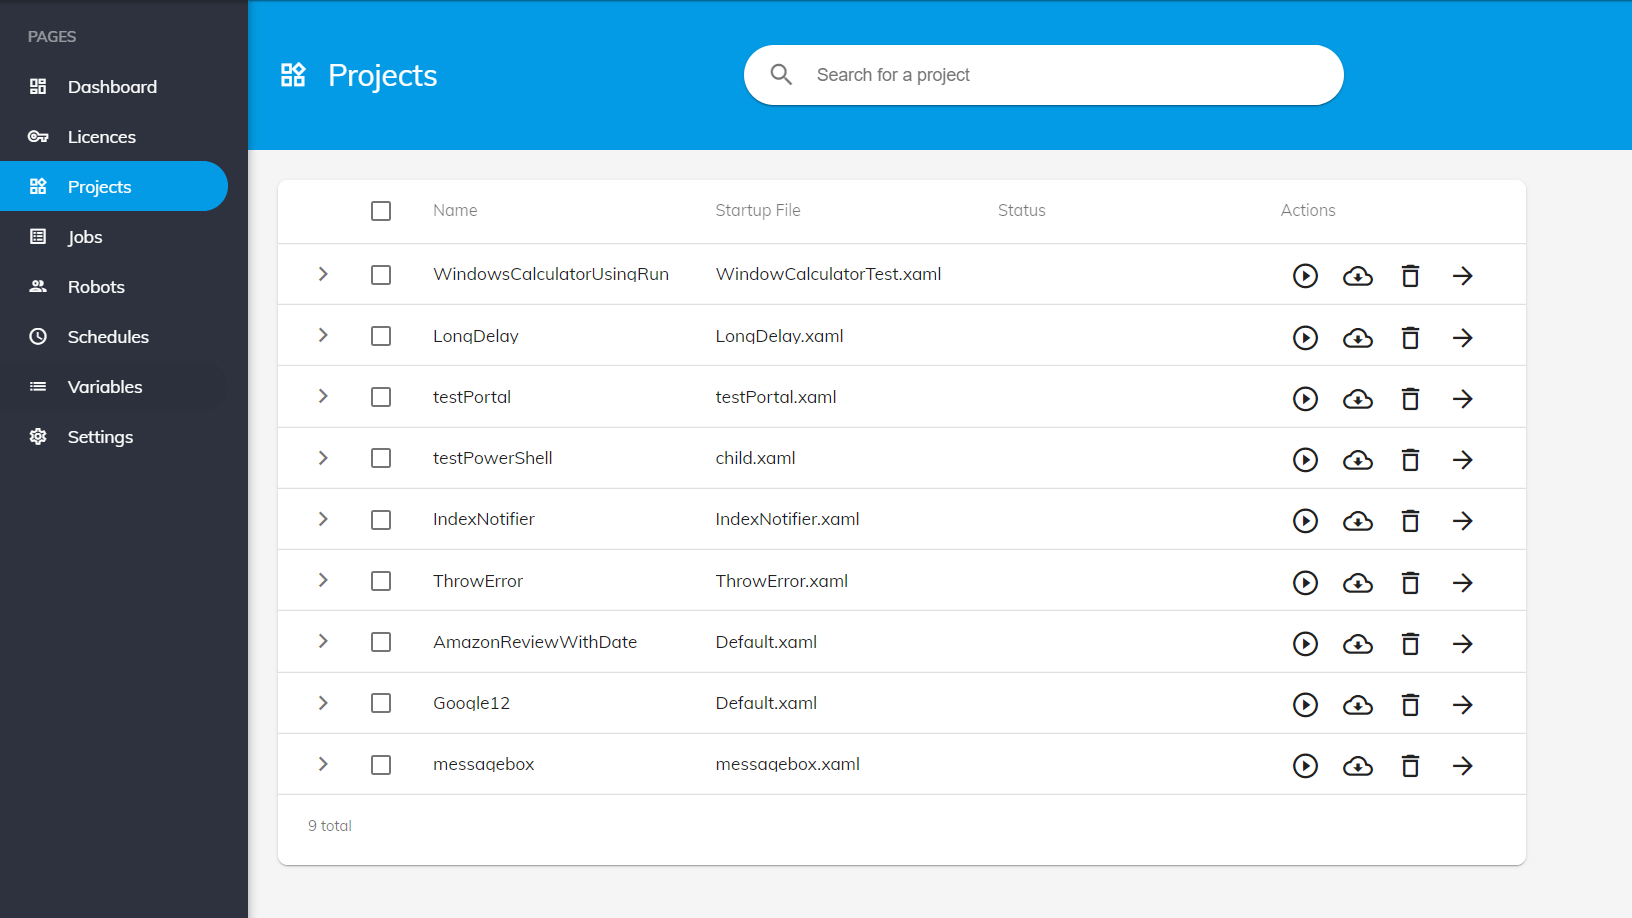
Available actions#
- Check Box Select multiple projects on which you want to perform a particular action.
- Name The name of the uploaded project.
- Startup File Startup workflow from this project.
- Status The current status of the project.
- Actions The actions that we can perform on a project.
Run Opens the dialog to run this project.
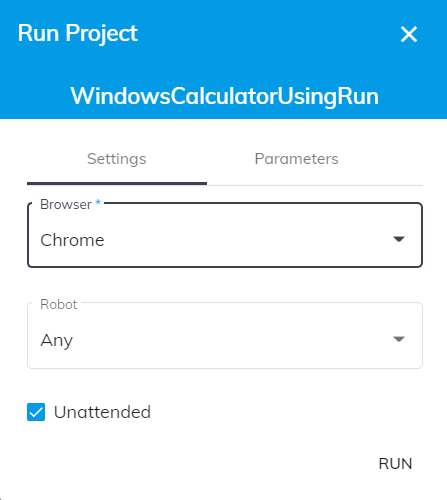
- Browser The browser to be used by the robot for running any web actions. You can either use the web driver or the extensions.
- Robot This is the actual Robot that is going to run the project. When 'Any', the portal uses the first available robot.
- Unattended Indicates unattended execution of the robot. By default, for web drivers we use unattended mode.
Download Downloads the current project. When run from Studio, it downloads the current project to the local Studio projects and opens it.
Delete Deletes the current project.
Jobs#
Displays detailed information on all running and completed jobs. A job is a project run.
Running#
The jobs currently running.

- Checkbox Allows us to delete multiple jobs at the same time.
- Project Name The name of the project that is currently running.
- Robot The name of the Robot that is running the job.
- Run Time The time when the job was started.
- State The state of the job; Pending Robot, Pending, Running.
- Status The status reported by the currently running activity.
- Actions The actions that can be performed on a job.
- Stop Aborts the current job.
- Replay Reruns the current job.
- Delete Deletes the current job.
Completed Jobs#
Displays the completed jobs including Failed and Aborted jobs.
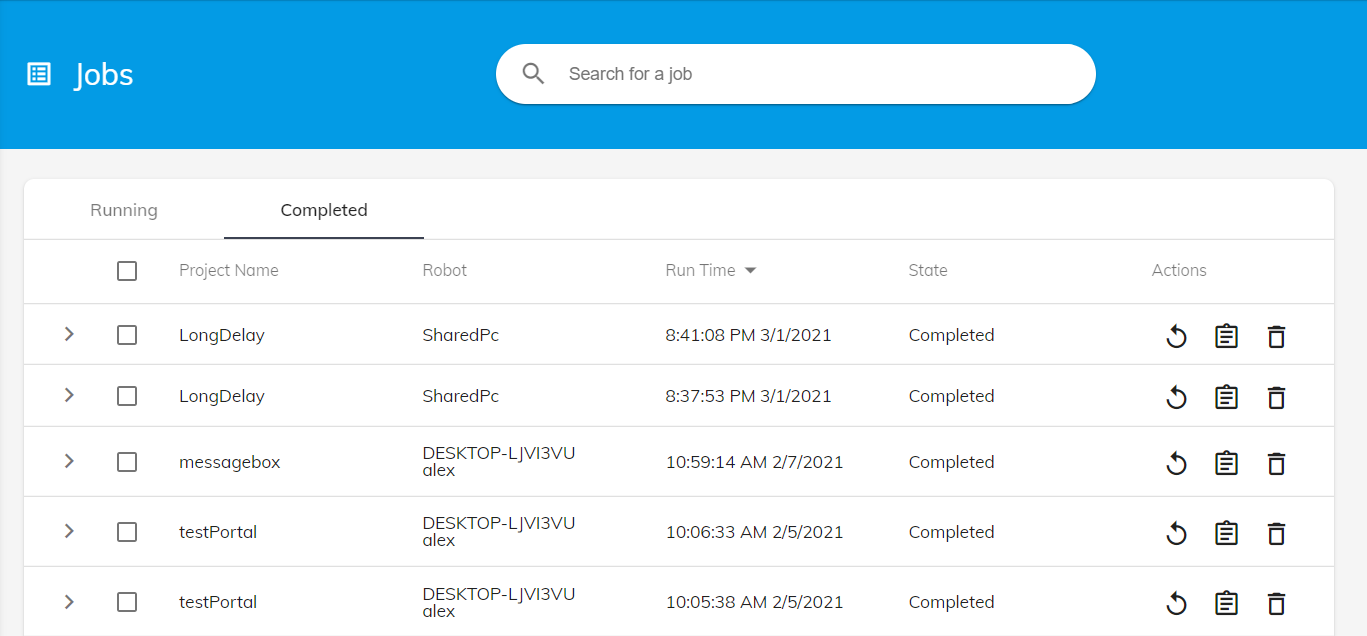
- Checkbox Select multiple jobs to be deleted.
- Project Name The name of the project that has been run.
- Robot The name of the Robot that has run the job.
- Run Time The time when the job was started.
- State The state of the job; Completed, Aborted, Error.
- Actions The actions that can be performed on a completed job.
- Replay Reruns the current job.
- Download log The completion log.
- Delete Deletes the current job.
Robots#
These are the available robots to run the projects.
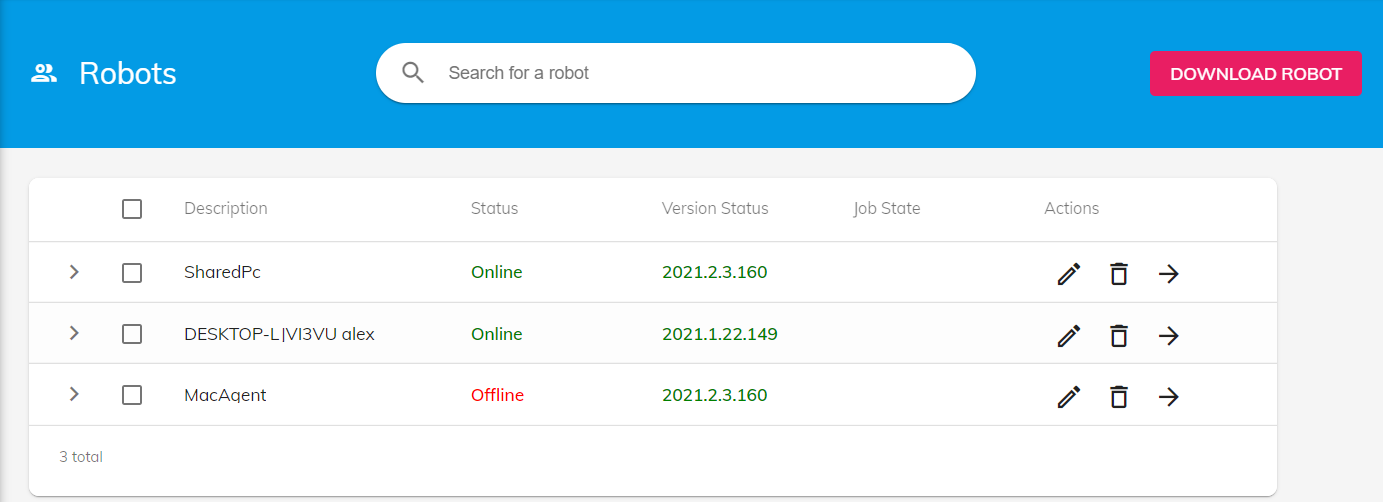
- Checkbox Selects multiple robots to be deleted at the same time. The robot will be displayed again after login. This is mainly used for offline robots that we don't plan to reactivate.
- Description The description of the robot. By default, it is the machine name concatenated with the username, but it can be changed using the edit button.
- Status The status of the robot. Offline or Online.
- Version Status The version of the robot. When the robot is out of date, the version is displayed using the red colour, and an update button is added as well. If the Robot is not online, but the version is out of date, a schedule Update button is displayed to schedule an update when the robot becomes available.
- Job Status The status of the robot. Whether is running a job and a line to the job.
- Actions The actions that we can be performed on a robot.
- Edit Edits the display name for the current robot.
- Delete Deletes the current robot instance. As explained above, the robot will be added again if in becomes available again, but we will lose the custom display name, if it was set.
- Go to Jobs Link to Jobs.
Schedules#
Displays all the schedules set on the projects. A project can be scheduled to run on any of the available robots.
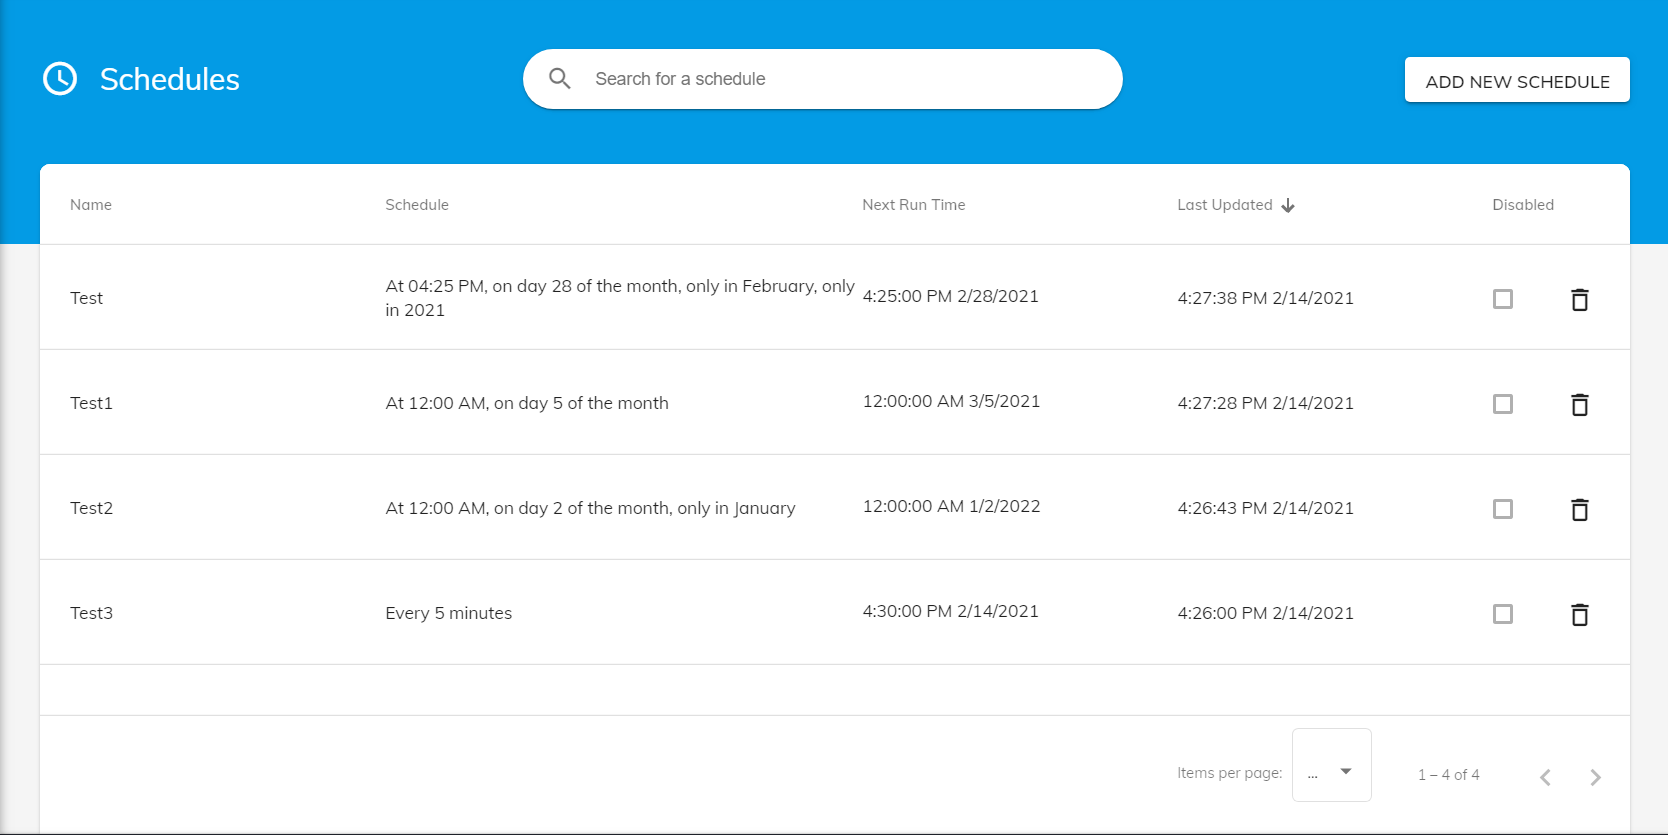
- Name The name of the schedule which will be displayed, and logged when running the corresponding project.
- Schedule Schedule run date and time details.
- Next Run Time The time when the schedule will run again, as calculated by the Robots. If there is no robot active, it is disabled or this is scheduled to run only once, the status will be N/A.
- Last Updated This is the time when the schedule was last changed.
- Disabled Shows the disabled status of the current schedule. A schedule can be disabled on the edit page.
- Delete Deletes the current schedule.
Edit Schedule#
To edit a schedule just click on the schedule row.
Basic Info#
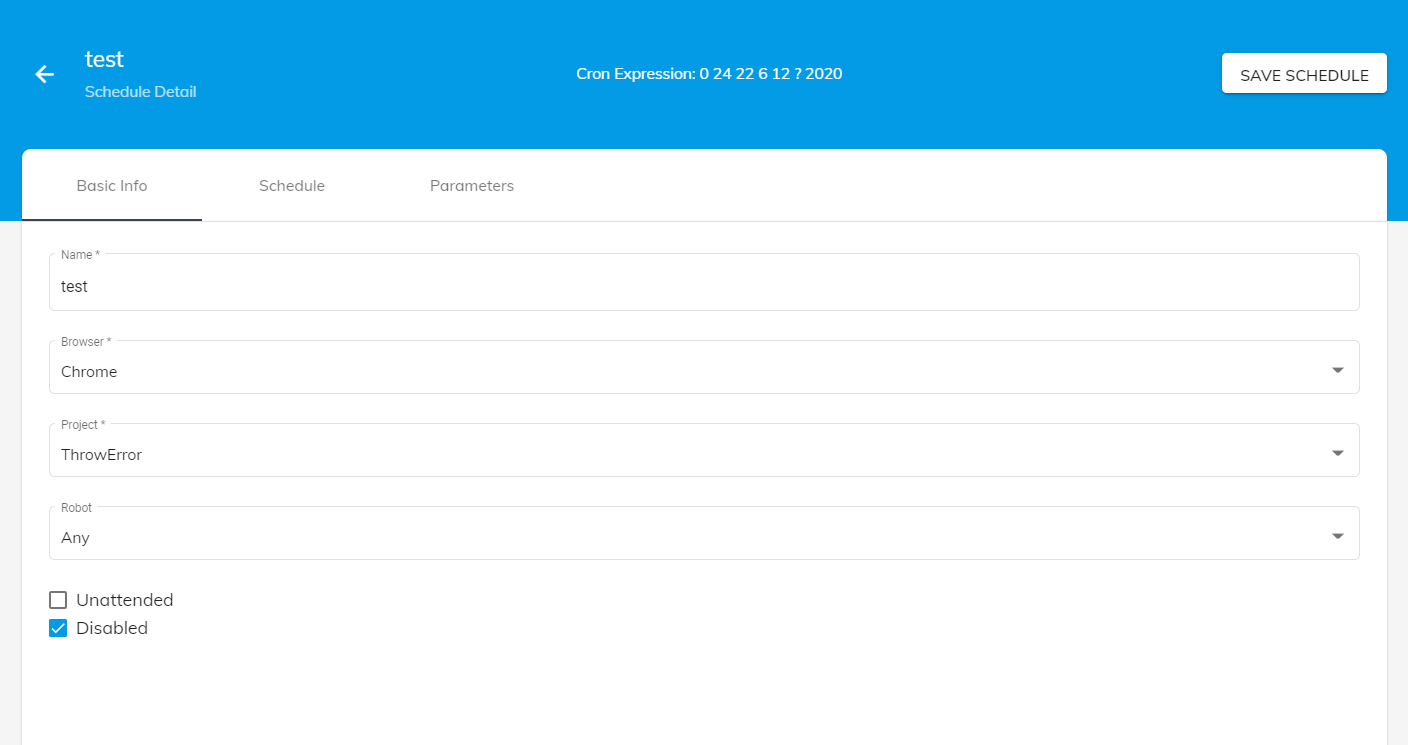
- Name The name of the schedule.
- Browser The browser used to execute the web activities. For web activities we can either use the extension or the web driver. For unattended mode, we can use Chrome, Firefox or Edge.
- Project The project to be run by this schedule.
- Robot Sets the robot used to run this schedule. It can be set to 'Any' or any other Robot available. When it is set to 'Any', the corresponding job will use any of the available robots to run it.
- Headless Sets the unattended mode when running the web activities.
- Disabled Disables this schedule.
Schedule#
Sets the schedule for this schedule item.
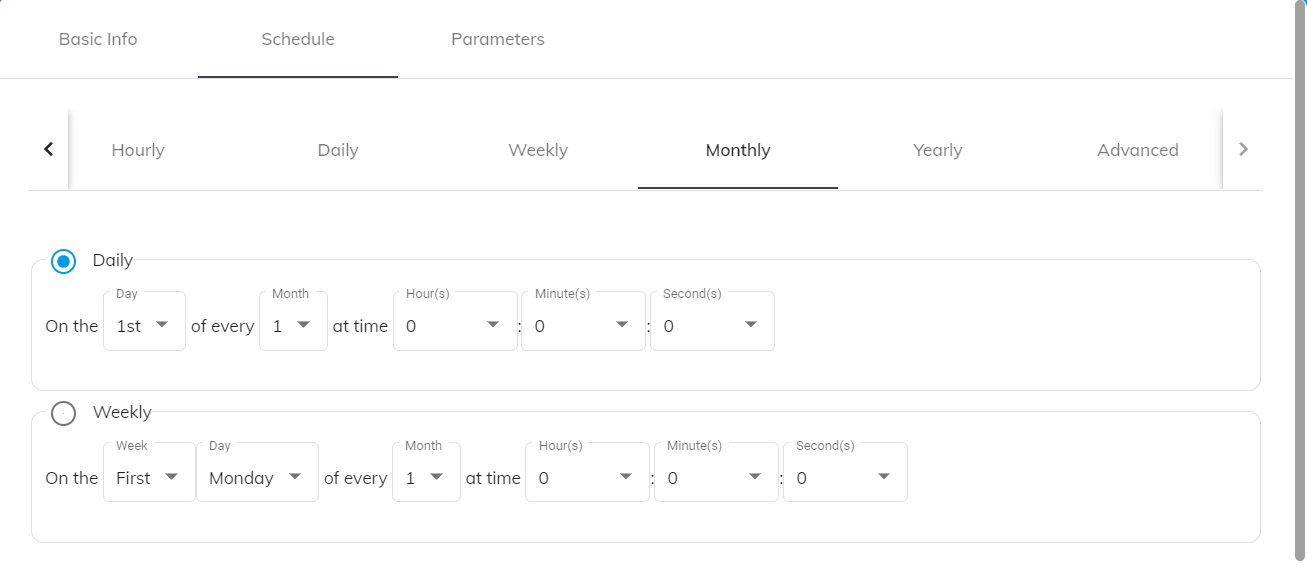
There are few preset schedule types and advanced option.
- Once Sets the schedule to run only once at a specific time.
- Every Minute Sets the minutes when this schedule is going to be run.
- Hourly The hours when this schedule is going to run.
- Daily The days when this schedule is going to run.
- Weekly The weeks days and time when this schedule is going to run.
- Monthly The days of the month when this schedule is going to run.
- Yearly The months of the year when this schedule is going to run.
- Advanced Here we can use a Cron Quartz expression. For instance, we can generate an expression using the following url https://www.freeformatter.com/cron-expression-generator-quartz.html and then paste that expression here.
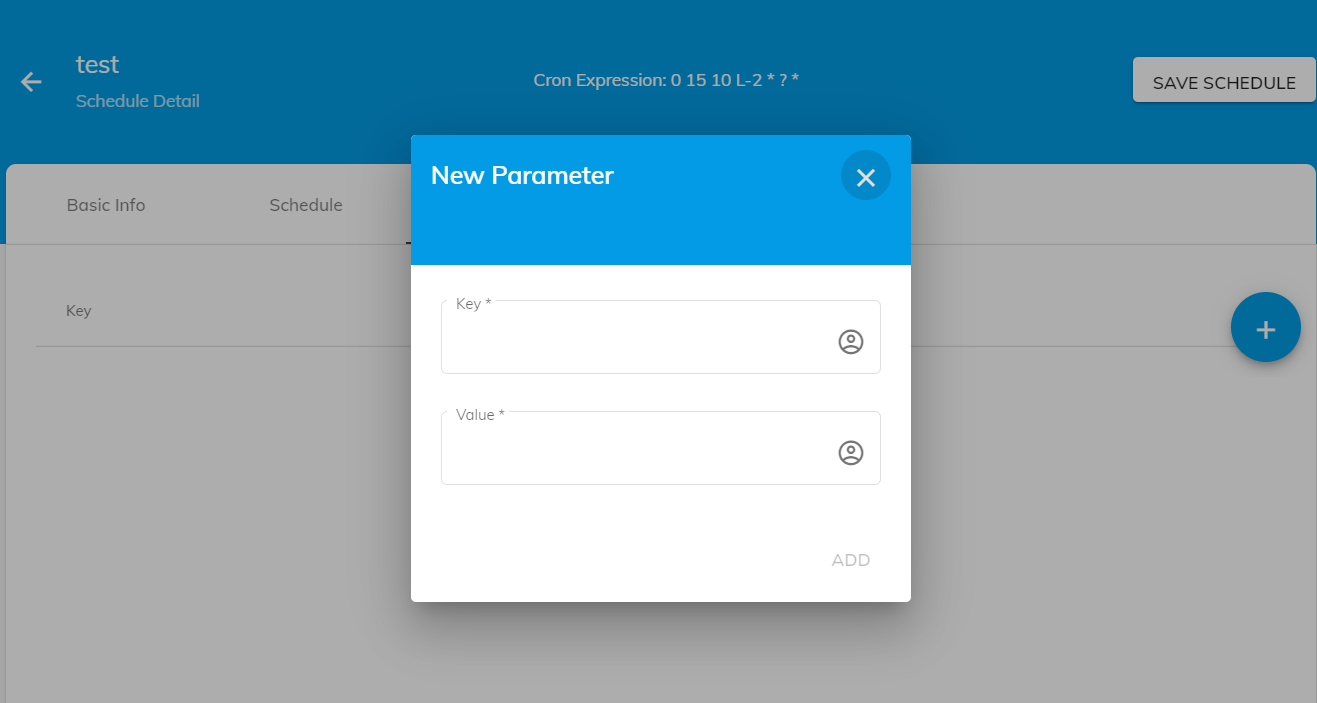
Parameters#
Any project can have input parameters and here we can set them. For instance, in the Rinkt Studio example of stock notifier, we could set the index name as input parameter to the project. The name represents the name of input argument defined in the workflow Arguments section. The name must be exactly the same.
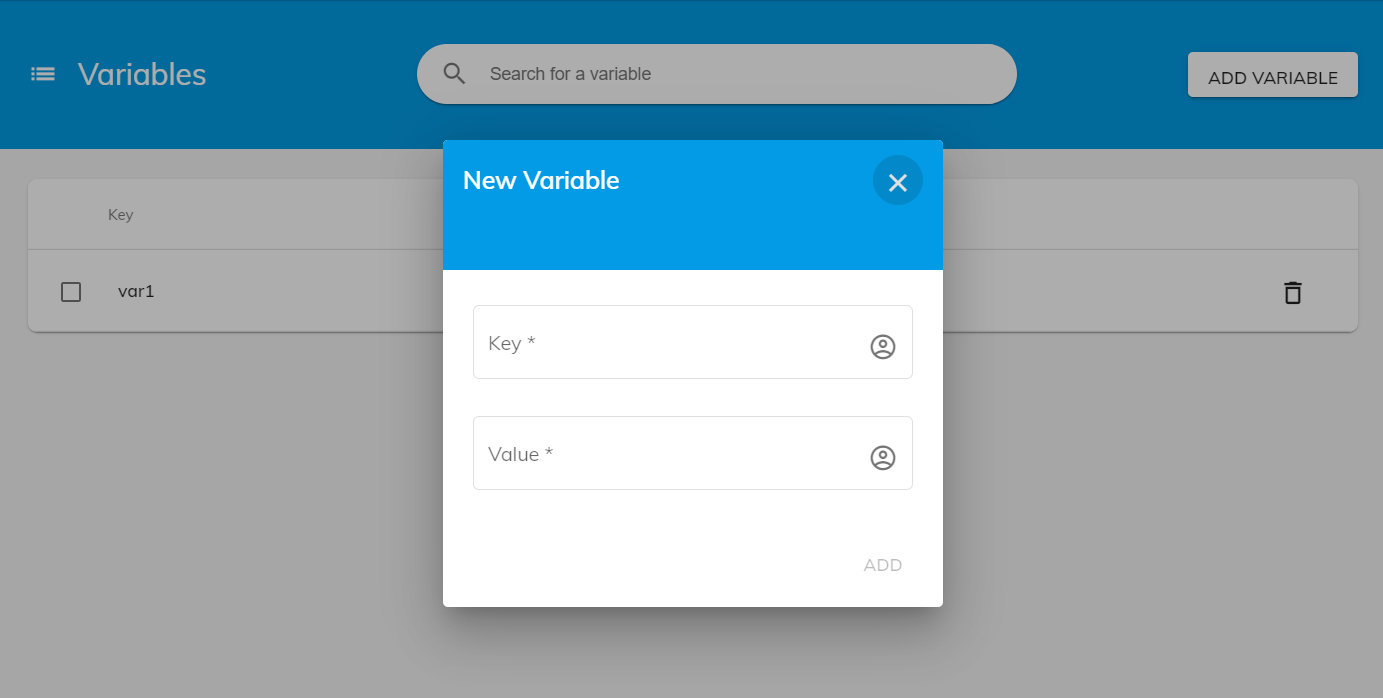
Variables#
Variables can be imported in any of the studio workflows and allows us to share data across workflows with the ability to change it without changing the actual workflow. For instance, we can use as variable the credentials to connect to a CRM portal. In case we want to change the user or the password, we just need to update the corresponding variable without changing the workflow.
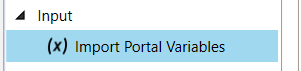
In order to import a variable in Studio, we must use the 'Import portal Variables'.
Settings#
These are the settings used by Robot when running a project
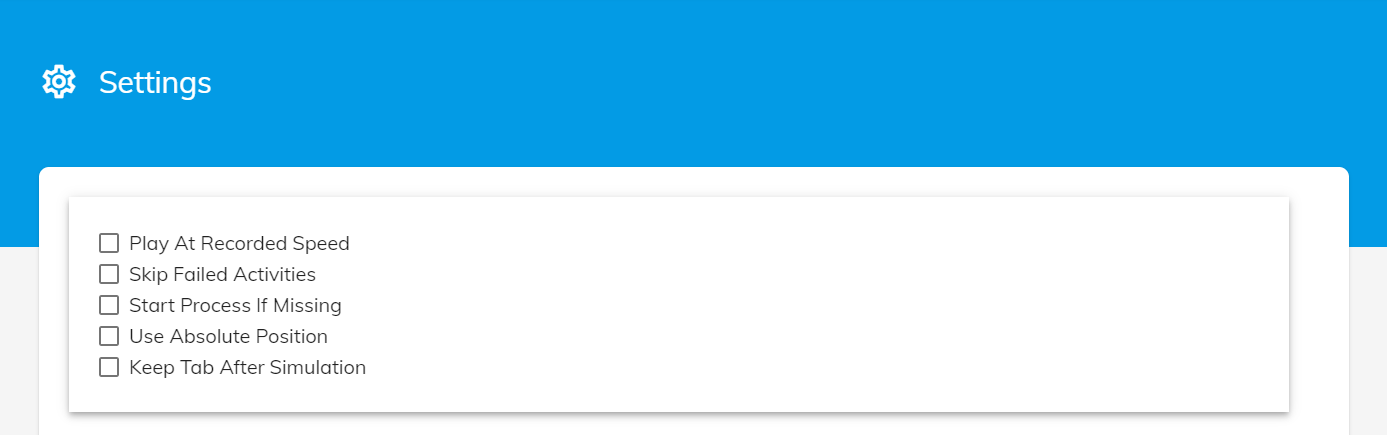
- Play At Recorded Speed Runs recorded activities at the same speed as they were recorded.
- Skip Failed Activities Ignores failed activities and continues with the next activity. Even if the failed activities are ignored, they will still be reported in the log.
- Start Process If Missing This applies only to mouse and keyboard desktop activities. If a mouse or desktop activity is on a process that is not running, this option will cause the corresponding process to be run automatically. The same option is available on the activity properties and for some activities it is set automatically based on how the process was started at recording.
- Use Absolute position for finding desktop elements Not recommended, but in some cases useful. Uses the recorded X and Y absolute positions to simulate a desktop event like click.
- Keep Tab After Simulation This mainly intended for debugging, and it keeps the tabs and browser open after a project with web activities has completed.