Rinkt Studio details
Design, build and run project workflows.
Title bar Settings#

Open Portal Opens Rinkt Portal with the default browser.

Send Feedback Opens rinkt contact web page.

Settings
 #
#Opens Settings dialog. Controls the record, play and general settings
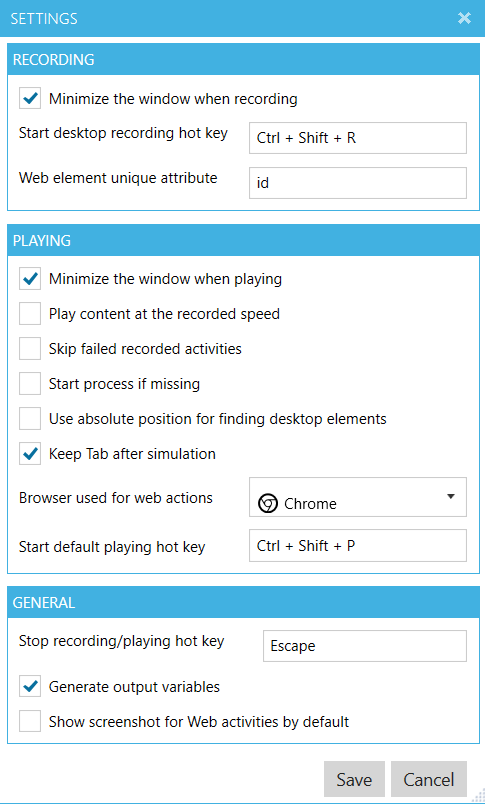
Minimize the window when recording Selecting this option will minimize the Rinkt Studio main window when recording so that we can highlight the browser, or the desktop application that we want to record. To stop the recording just press the stop Hot Key(by default is ESC)
Start desktop recording hot key Defines the hot key used to start desktop (only) recording. It can be changed by setting the focus on the text box and start typing the keys that we want to use for recording.
Web element unique attribute Controls the attribute used by recording to identify the unique web elements. By default, the attribute is id, but in some cases the unique attribute might be for instance data-automationId. Even if the element doesn't have a unique attribute, we use a combination of other attributes including parent attributes to build the path.
Minimize the window when playing Minimizes the main Rinkt Studio window when running the workflow. When simulating desktop events and the corresponding window element is not found using the provided details, the system is using the screenshot to match against active windows and in this case it is recommended for Rinkt Studio to be minimized.
Play content at the recorded speed All the recorded events (web or desktop) will be played back at the original recorded speed. Otherwise, the web or desktop events will be simulated as fast as possible.
Skip failed recorded activities Ignores all recorded activities which fail and continues onto the next activity.
note
If you know that some recorded actions might fail you can ignore all of them and continue with the execution of the workflow. All errors are still reported in the output and error window.
Start process if missing Starts a Windows application process if the window cannot be found for a desktop event.
note
This option is only available for desktop events.
Use absolute position for finding desktop elements Use recorded absolute position to simulate desktop events when the element(control) cannot be found using the automation details or image matching.
note
Not recommended, however in certain situations, the option is available when we know that the position of the element will not change, or we want to simulate an event at an exact position.
Keep Tab after simulation Keeps the last browser tab or window open after executing the web events, and the workflow has completed. This is useful when we want to see the result of the workflow.
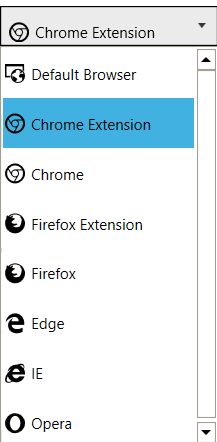
Browser used for web actions This enables you to select the browser to be used to run the web events. If the default browser is not supported, it defaults to Microsoft Internet Explorer.
note
All browser options expect the one with Extension in the name will use the web driver.
- Default Browser Use default operating system browser or Internet Explorer if the default browser is not supported.
- Chrome Extension (Recommended) Use Rinkt extension for Chrome to execute web activities.
note
This is the recommended option when running a workflow in Studio, as the extension will be able to access, and use any existing cookies (such as credentials ...), and has extended capabilities for events, it will start a new tab using the currently opened Chrome browser.
- Chrome Use Google Chrome web driver for running web activities.
- Firefox Extension Uses Rinkt extension for Firefox to execute web activities. This allows us to integrate with the running Firefox browser or use the existing Firefox settings for the current user(like autologin).
- FireFox Use Firefox web driver for running web activities.
- Edge Use Edge webdriver for running web activities.
- IE Use Internet Explorer web driver for running web activities.
- Opera Use Opera web driver for running web activities.
Recording#
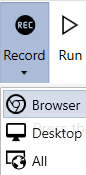 For activity recording we have 3 options:
Browser#
Starts recording the web browser events using the active, and selected browser extension.
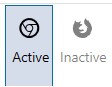
In the above image, the active and selected extension is Chrome Extension, and the recording will use Chrome browser to perform the recording, if available.
If the extension is selected, but not active, the recording will ask you to install/enable the extension.
The extension is reported as inactive when the corresponding browser is not running, the extension is disabled for that browser, or it is not installed.
The selected browser extension can be changed by clicking on Chrome or Firefox icon.
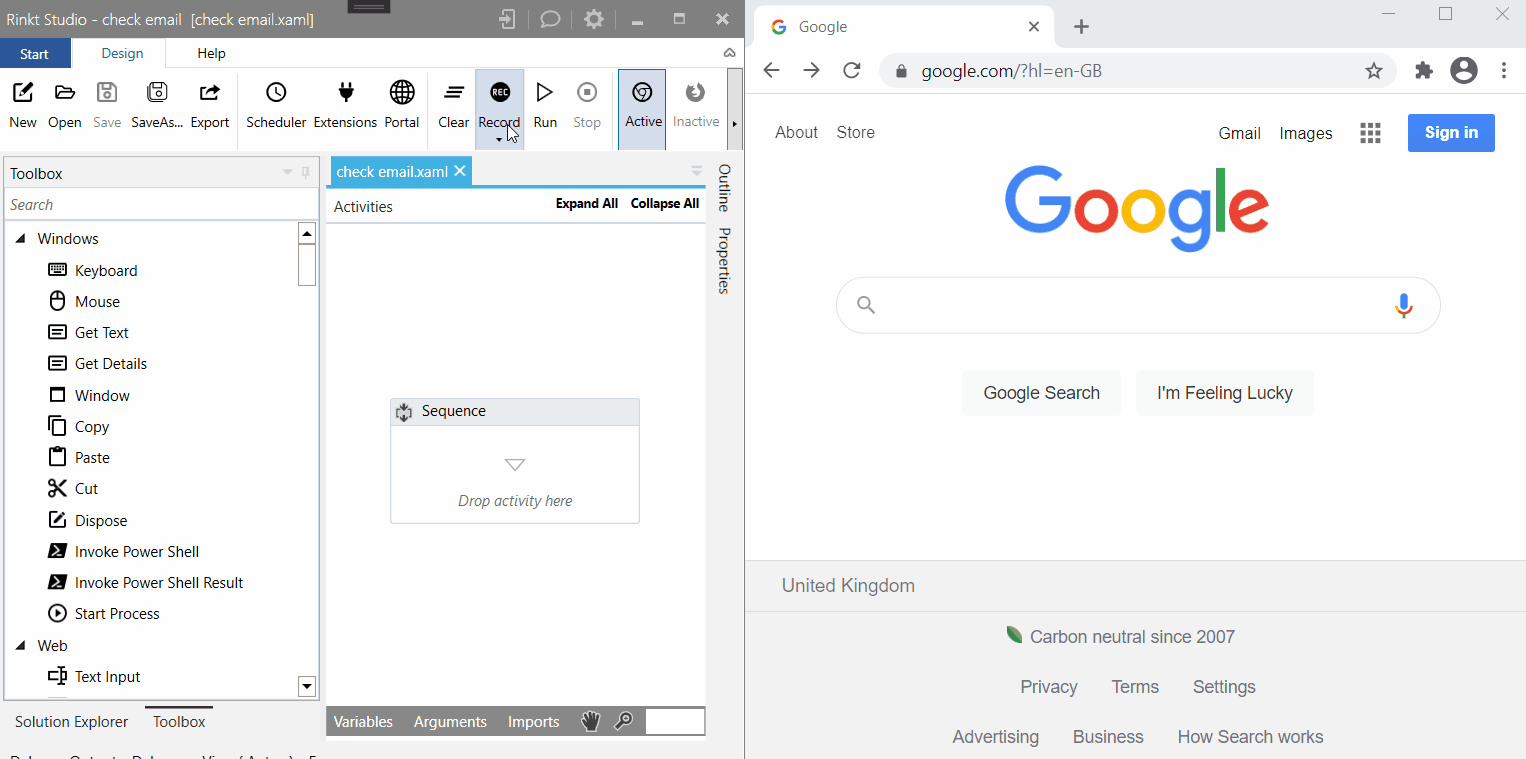
Desktop#
Starts the recording of desktop applications events. Alternatively, you can use the ‘hot key’ (default CTRL SHIFT R) to start the event recording.
All#
Starts the recording for both web and desktop. When recording 'all' events, desktop recording will stop capturing the web events, and it will delegate the work to the corresponding browser extension.
note
For stopping the recording there 2 options
- Press 'stop' button on the Rinkt Studio toolbar.
- Use the 'hotkey' set in Settings(default ESC).
Activity Context menu#
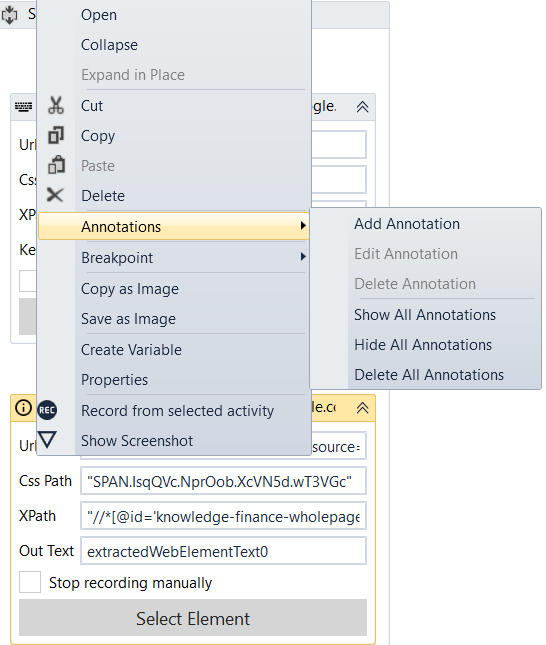
Activity context menu is displayed when you right click on an activity in the workflow.
Shortcuts#
- F1 - Opens the help page fo this activity.
- F9 - Sets a breakpoint on this activity.
- F5 - Continues execution if the debugger is stopped on this activity.
- F11 - Steps over this activity.
Menu Items#
Open - Opens the activity(drills down), and it becomes the only visible activity in the workflow. To go back, use 'View Parent' menu item from context menu or the breadcrumb menu at the top of the document, under title. The same action, Open, can be performed by double-clicking on the activity.
Collapse - Collapses the designer by hiding the activity designer content area.
Expand in place - Expands a collapsed activity.
Cut -Cuts the selected activity.
Copy -Copies the selected activity.
Paste -Paste an activity from clipboard after the selected activity.
Delete -Deletes the selected activity.
Annotations - Adds, Edits or deletes the current annotation. We use annotations to add details about an activity(What is doing, what is using). Also, through this menu you show, hide or delete all the annotations in this workflow.
Breakpoints - Add, removes, disables or enables a breakpoint for the selected activity.
Copy as Image - Copies the activity designer as an image.
Save as Image - Saves the activity designer as an image.
Create Variable - Opens the variable editor and creates a variable of type string.
Properties - Shows properties for the selected activity.
Record from Selected activity - Starts web recording from the selected activity.
Shows Screenshot - Displays the screenshot taken at record time for desktop and web activities.
Shows Element Selection - Displays the selected activity editable content.
Workflow Panels#
Workflow panels contains the variables, Arguments and the Imports for a workflow. Each workflow has its own variables, arguments and imports.
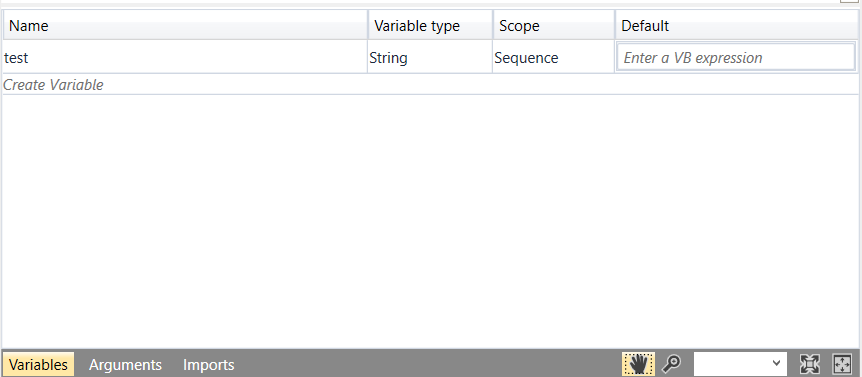
Variables#
Variables panel displays all the variables for a selected activity. Each variable has a 'Name', 'Type', 'Scope' and 'Default value'. Scope refers to the visibility of the variable.
A variable associated with an activity can be accessed by all its descendents. Variables allow us to pass data between activities. E.g., in the stock notifier example below, we use a generated string variable that stores the value of a stock index, extracted from google, to add it to the email subject.
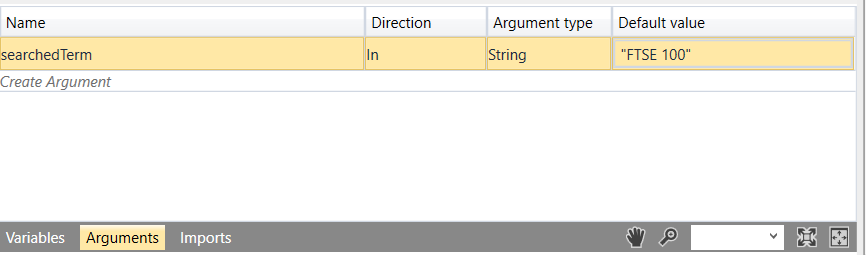
Arguments#
Arguments are used as input and/or output for a workflow. As an example, with the stock notifier workflow below you pass to google search a value, instead of hard coding the value "FTSE 100".
We could use an argument which by default has the value set to "FTSE 100” and use the same workflow to search for some other index, by simply passing the input from the scheduler.
Out arguments are used to return values from the execution of the workflow. For example, we can have a child workflow that extracts the stock value from google, and a parent workflow that calls this workflow for a set of different indices. The child workflow will have an output argument which will be the extracted index value, which is then mapped to a variable on the parent workflow.
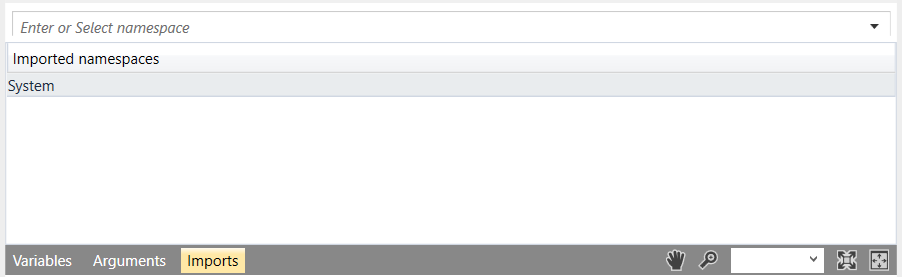
Imports#
Represents the imported types used in expressions. For instance, to be able to use the ‘Regex’ static methods, you have to import ‘Regex’ type. If you want to use a specific type defined in an assembly in an expression, we will first have to import that assembly, in Start/Imported Types, first and then import the type here.